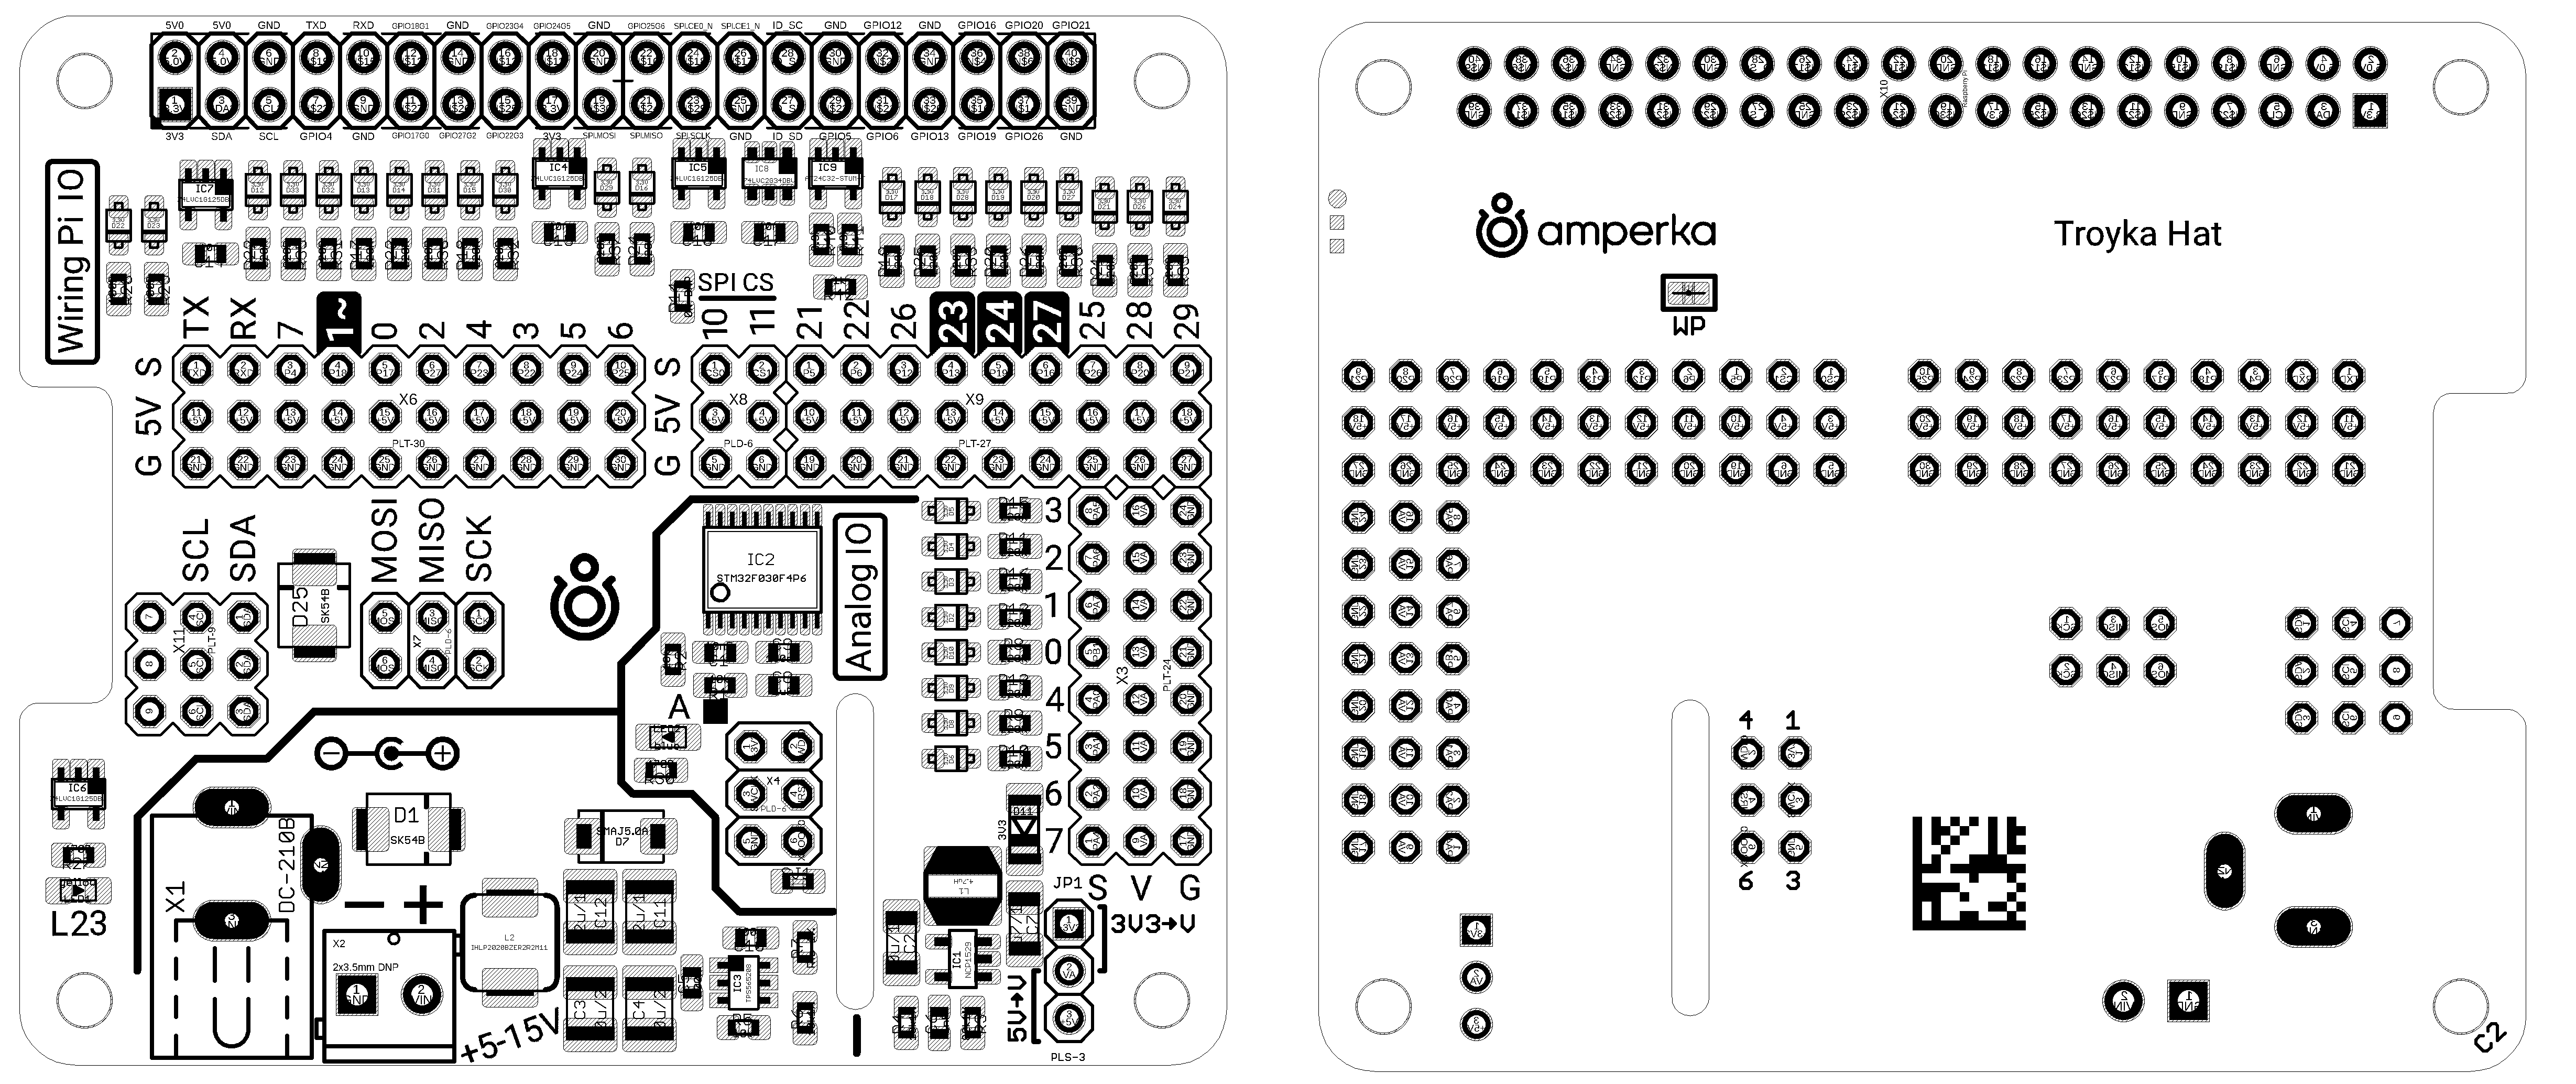
Raspberry Pi Troyka HAT
Lifesaver board for Raspberry Pi projects that include GPIO ports with many peripherals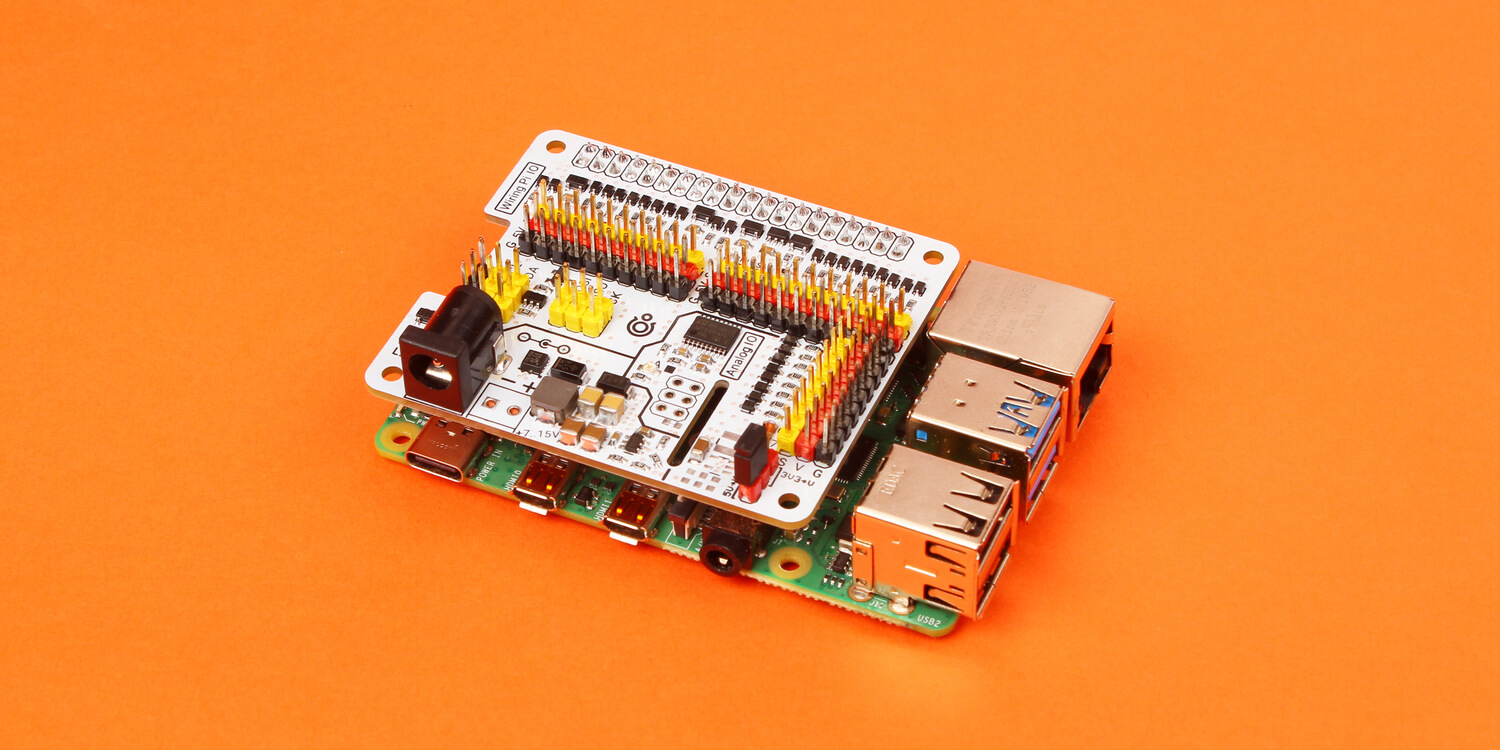


Make RPi GPIO ports great again
Creating a project that uses Raspberry Pi GPIO pins? Get ready:
- RPi doesn’t have any ADC, so you can’t work with analog sensors;
- it has only two PWM pins;
- it can’t work with 5V peripherals;
- you have to make sure that you have a steady 5V power supply.
Troyka HAT is a solution to all these troubles and more. Still wonder why? Read on!
8 ADC ports for analog sensors
Since RPi doesn’t have any analog-to-digital converter, you have to use a special ADC module or a chip to start working with a simple potentiometer or a mundane LDR sensor, which involves a breadboard and a lot of wiring. Forget those. Use Troyka HAT.
8 independent PWM ports
Raspberry Pi has only two PWM-capable pins, but it gets up to eight with Troyka HAT. You’re welcome to control more LEDs, motors, servos, etc.

All ports are 5V tolerant
Some devices such as common ultrasonic range finders can only be powered by 5 volts. RPi outputs only 3.3V, and more importantly, it expects no more than 3.3V as input from GPIO. There’s a risk of burning the pin if you somehow power up a 5V module and won’t make sure that it outputs 3.3V back to RPi. Troyka HAT fixes all that, so you can skip reading datasheets and just plug it in.
Steady 5V supply for your Raspberry
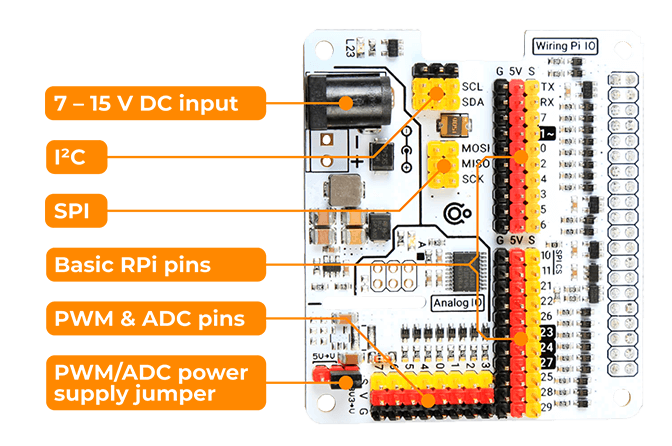
Ever tried to power an RPi with a rechargeable battery? The board requires a steady 5V supply, and even the tiny voltage drop of 0.25 volts can lead to unpredictable consequences. The Troyka HAT DC input accepts 7–15V and outputs a neat 5 volts, so whatever is connected to it, your Raspberry won’t go nuts and reset.
WiringPi library allows you to use “Arduino” methods in the code for GPIO pins. It’s fully compatible with Troyka HAT.
Here’s a sneak peak:
# The classic “blink” example

import troykahat
from time import sleep

# Constant for Pin 7 of Wiring PI IO.
# Connect an LED to this pin.
PIN_WP_LED = 7

# Gives access to all the functions of GPIO,
# that are labeled "Wiring PI IO" on the HAT.
# Check WiringPI library API for the functions reference.
wp = troykahat.wiringpi_io()
# Configures the LED pin of Wiring PI IO
# to an output mode.
wp.pinMode(PIN_WP_LED, wp.OUTPUT)

whileTrue:
    # Sets HIGH voltage level for the LED pin
    # of Wiring PI IO.
    wp.digitalWrite(PIN_WP_LED, True)
    # Wait 500 ms.sleep(0.5)
    # Sets HIGH voltage level for the LED pin
    # of Wiring PI IO.
    wp.digitalWrite(PIN_WP_LED, False)
    # Wait 500 ms.sleep(0.5)
We’ve made a compatible library that allows you to use additional PWM and ADC ports without hassle. It uses WiringPi methods for convenience.
Here’s how it feels:

# PWM example “dimming LED”
import troykahat
# Constant for Pin 7 of Analog PI IO.
# Connect an LED to this pin.
PIN_AP_LED = 7
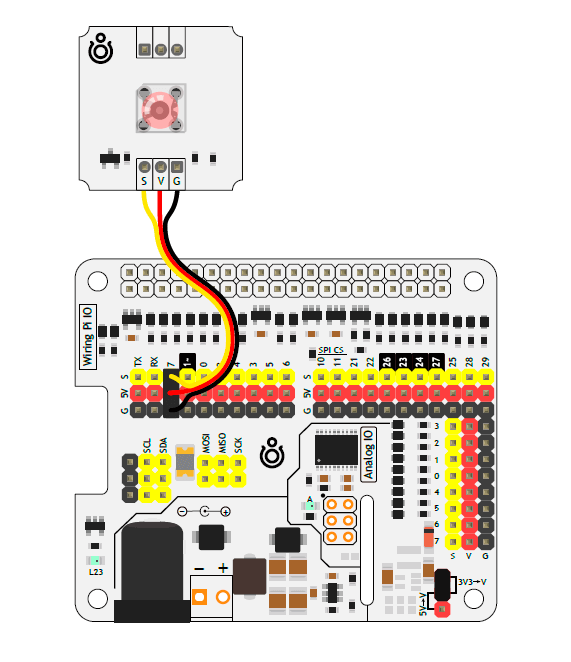
# Constant for Pin 3 of Analog PI IO.
# Connect an Potentiometer to this pin.
PIN_AP_POT = 3
# Gives access to all the functions of GPIO,
# that are labeled "Analog IO" on the HAT.
# See API.md for the functions reference.
ap = troykahat.analog_io()
# Configures the LED pin of Analog IO to an output mode.
ap.pinMode(PIN_AP_LED, ap.OUTPUT)
# Configures the potentiometer pin of Analog IO
# to an input mode.
ap.pinMode(PIN_AP_LED, ap.INPUT)
whileTrue:
# Read the potentiometer value
potValue = ap.analogRead(PIN_AP_POT)
# Set the LED brightness
# according to potentiometer value
ap.analogWrite(PIN_AP_LED, potValue)
RoHS compliant
Troyka HAT does not contain lead, so it is safe for children. It also won’t poison the rivers one day it would be wasted.
Specifications
- Available Ports
- GPIO (S-V-G): 21
- SPI:3
- I²C:2
- ADC:8
- ADC resolution:8 bit
- PWM:8
- PWM resolution:12 bit
- Electrical Characteristics
- Logic Voltage: 3.3–5 V
- DC Input Voltage: 7–15 V
- Max. 5V Pin Current 3.5 A
- Communication
- Compatibility: All RPi boards with 40-pin GPIO header
- Interface: I²C
- Default Address: 42 ( 2A hex)
- Microcontroller: STM32F030F4P6
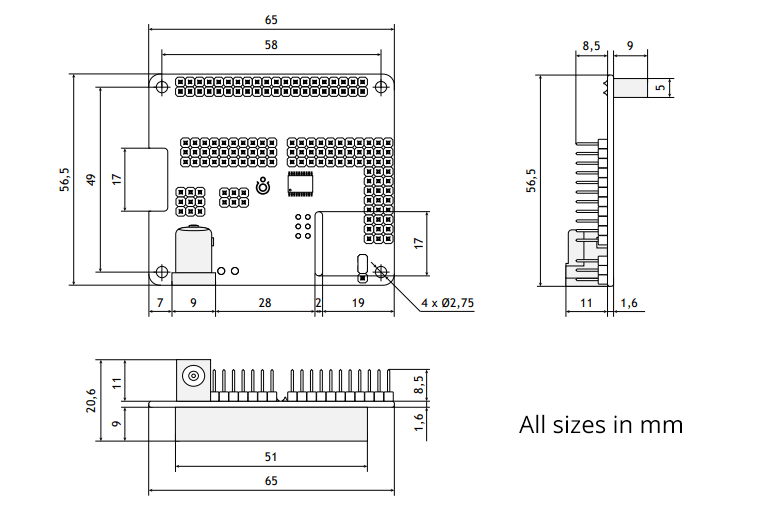
- Mechanical Characteristics
- Dimensions: 65 × 56.5 × 20.5 mm
- Weight: 40 g